 |
| BITE lipstick in Zin/liner in Cashew/primer w/Boscia blotting papers |
Sunday, December 15, 2013
BEAUTY: Food Grade Cosmetics with Colors that BITE
Saturday, November 9, 2013
DESSERT/SPLURGE: Eggless, Oatmeal Chocolate Chip Cookies w/Sea Salt
 If you're like me, you work out, eat healthy, and when you want to cheat, you want something that's recipe on allrecipes.com, and just modified them a bit to make these cookies a bit extra jazzy (extra vanilla, all brown sugar, and an extra brushing of salt); enjoy!
worth the calories. These cookies are worth cheating, in fact, you may even find that they're worth an extra pound. I haven't baked cookies in ages; mostly because I have little to no luck with them. They always turn out too crunchy for my taste. Luckily, I found a great
Servings: 8-10 large cookies
Ingredients:
- 1/2 cup butter
- 3/4 cups brown sugar (loosely packed)
- 2 tsp vanilla extract
- 3/4 cup all-purpose flour
- 1.5 tsps baking powder (or .5 tsps baking soda)
- 1/8 cup boiling water
- 1 cup quick oats
- 1/2 tsp salt
- 3/4 cups semi-sweet chocolate chips
- 1/4 tsp course sea salt to top cookies (optional)
Instructions:
- Beat butter or margarine, sugars and vanilla until smooth. Add flour and salt, mix well. I highly recommend you use a hand mixer (nothing fancy - the $20 ones at Target or Walmart work really well)
- Dissolve baking soda in boiling water and beat into mixture. Stir in oats and chocolate
chips.
- For large cookies (as in shown in the picture), use an ice cream scoop to scoop batter onto a greased baking sheet (or baking sheet with wax paper). Don't flatten scooped batter. Bake at 350 degrees F (175 degrees C) for 15-17 minutes. Do not bake longer unless you want crispy cookies - this time and temperature creates a moist, chewy cookie.
Sunday, October 27, 2013
TECH: Nike Training Club App
 For the ladies who love to workout: try the Nike Training Club app...it is amazing! #cuzimnotcreativeat6am
Tuesday, July 23, 2013
Three Breakfast Smoothies to Slim, Energize, and Nourish
 (Original article posted on Illume Magazine)
 Breakfast is often said to be the most important meal of the day; unfortunately, it is frequently
skipped or nutritionally sparse for most people. Breakfast smoothies are a great way to incorporate nutrition into your day. Done right, they're easy to make, breakfast smoothies incredibly nutritious, and can give you the energy you need to start your day right.
Why a breakfast smoothie and not a breakfast juice? Though juicing is all the rage right now, the process removes fiber and most nutrients rendering the end product not so nutritionally sound. In some cases, juiced drinks are not much more than a quick dose of sugar.
Whole blending, which as its name implies blends the edible parts of whole fruits and vegetables, and delivers drinks that are full of fiber, nutrients, and good carbs. These nutritionally dense drinks can help devotees lose weight, stave off illnesses, and boost energy. Blending does typically require that one own a good to high-end blender; Vitamix is a brand that most smoothie lovers swear by.
As the infographic implies, there are some ingredients that top the list as "smoothie-worthy" - check out the slideshow from my full article on Illume Magazine for full details on each one of these amazing ingredients.
Power Breakfast Smoothie Recipes
 GreenTastic – blend half a cup of kale, half a cup
of spinach, one cup of pineapple, one and a half cups of water, and half
a lemon for a nutritional blast
GreenTastic – blend half a cup of kale, half a cup
of spinach, one cup of pineapple, one and a half cups of water, and half
a lemon for a nutritional blastAlmondBlast – blend a cup of kefir, half a cup of non-fat milk, a frozen banana, one tbsp. of peanut butter, and some almonds for a fantastic breakfast treat.
BeetAround – blend a quarter of a medium sized raw beet (completely cut off the outside skin), a whole red apple, one cup of almond milk or non-fat milk, and half a cup of kefir for a unique take on beets...feel free to add honey if you like.
BONUS RECIPE: KaleMeetKefir– blend a cup of kefir, a cup of kale, a banana, a quarter cup of pineapple, and at least one cup of almond milk for a smooth green treat.
Enjoy these recipes, create your own favorites, and find new combinations online. Cheers!
Friday, July 12, 2013
BUILDING BLOCK: Vitamix Bread Crumbs

PERFECTIONIST ADDITION: Dry out your bread before blending by sticking it in the oven at 200 for at least an hour, or toast your crumbs (blend un-toasted bread in this scenario) after blending by simply putting them in a pan on the stove (be sure to keep moving the crumbs to avoid burning).
Thursday, July 11, 2013
DINNER: Shish Taouk (Mediterranean Chicken Skewers)
 Mediterranean food is incredibly healthy and flavorful...the problem is, it didn't seem to be the easiest thing to make at home. Not true! I wanted to try to make my favorite chicken kabobs (Shish Taouk or Shish Tawook), and found more than a few good recipes online**. I modified the recipes I liked the most to come up with a recipe that is guaranteed to yield "yums". Serve these tasty skewers with some tabouli, hummus, or just grilled veggies, and you're all set. Here goes:
Servings: 2-3
Ingredients:
- 1 lb chicken - cubed or diced into small/medium pieces
- 5-6 cloves garlic
- 1/2-1 tbsp cayenne pepper
- 1 tsp salt
- 2 tsp black pepper
- 1 small lemon, peeled
- 1 small tomato
- 1 cup yogurt
- 2 tbsp sumac
- 2-3 tbsp olive oil
- Handful of cilantro
- Skewers
- Chop small squares of onion or bell pepper (you'll use this on the skewer)
Instructions:
- Soak chicken in a bowl of plain vinegar for at least 5 minutes, drain vinegar
- Blend all ingredients (except chicken and chunks of onion/bell pepper) in a blender until smooth
- Pour blend over chicken in bowl - let marinate for at least 20-30 minutes
- Note: you can use this marinade as a saute for other vegetables you'd like to serve with your chicken
- Use skewer to thread chicken and bell pepper
- Cook the chicken on a cast iron skillet - rotate every 5-7 minutes until the chicken is thoroughly cooked
- Alternative: place chicken on a foil lined pan in the oven at 400 for 45 minutes
- Enjoy!
**http://www.food.com/recipe/shish-taouk-lebanese-chicken-skewers-66035
Tuesday, June 18, 2013
BUILDING BLOCK: Almond Milk
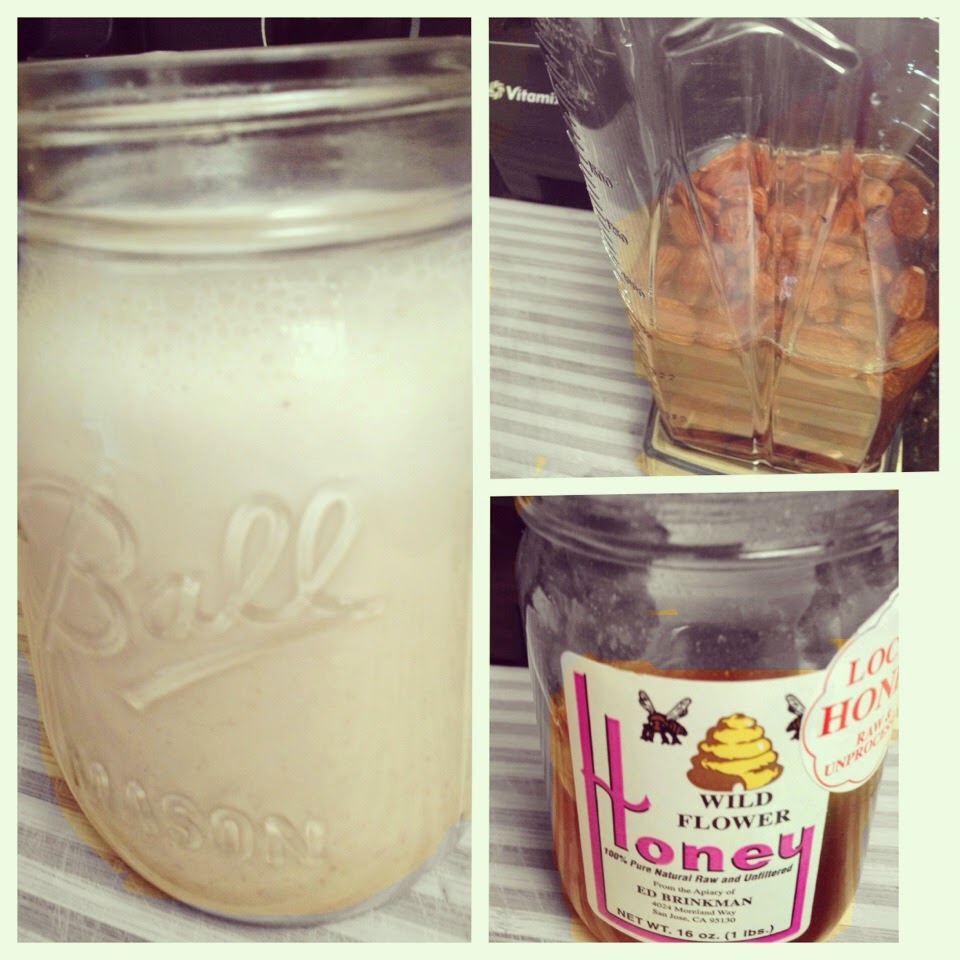 Almond milk at the store is full of sugar, preservatives, and not much else. Why not make it yourself? You simply blend almonds, water, and some sweetener (honey, dates, etc), and voila you have yourself home-made, raw almond milk. You can of course choose to filter the milk through a fine sieve or nut bag, but I opt to have it unfiltered.
I don't pre-soak the almonds, or add salt, but you probably should - click here for the "right-way" to make almond milk.
Thursday, June 13, 2013
BEAUTY: Where have you been my whole life, eos?
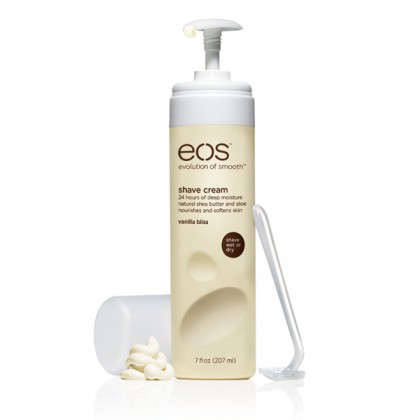 I am one of those people who cannot maintain any type of a non-essential routine: dry cleaning pickups, car washes, and waxing are all under the category of non-essential for me, which means I hardly do them. Skipping the latter is a problem because I resort to shaving, which is not fun if you're like me and have some Chewbacca-like tendencies. Lucky for me, I bought a bottle of eos shaving cream today, and it literally altered my normally torturous shaving experience. If you don't like razor bumps, do like smooth skin, and need a shaving boost...buy a bottle today!
Wednesday, March 13, 2013
TECHNIQUE: The Right Way to Cut a Pineapple
Pineapple is a staple of many of my smoothies, drinks, and even salads. As such, I cut at least one pineapple every week, if not two. Let me tell you, there is a right and wrong way to cut a pineapple. The technique I see most people use (basically make deep cuts to the pineapple to get rid of the skin in a few short steps) is pretty wasteful. I learned the technique below from several "fruit" masters - it essentially reduces pineapple wastage, and also ensures that you get rid of all of the parts of the fruit that cause some people "itchy mouth". Also, while I didn't include it in the steps, you can slather the pineapple with a bit of salt - that tends to really get rid of the itchies. Enjoy!
So here are the steps (with accompanying pictures):


So here are the steps (with accompanying pictures):
 |
| Rinse your pineapple before you start cutting into it. |
 |
| Twist off the crown (leaves) of the pineapple - simply hold the base of the pineapple with your non-dominant hand, and twist the crown from the base with your dominant hand |
 | |
|

 |
| Set your
pineapple upright, with either base at the bottom. Start shaving the
exterior of the pineapple - simply embed your knife at the top of the pineapple. Cut in a way that you angle out initially and then have your knife go straight down the sides. Your goal is NOT to remove the little eyes of the pineapple - it is simply to get rid of most of the green skin. |


 |
| As you cut, you will have to go back and make the same cuts you did in step 4, but for the edges of the pineapple. |
 |
| Saw around the bottom part of the pineapple to remove the green parts you likely missed in steps 4 and 5 |
 |
| Lightly shave off any remaining green parts |
 |
| Now for the eyes, set your knife above any two or three eyes and cut inwards (at a diagonal). Do the same thing under the same eyes you cut above. The top and bottom cut should allow you to pop out the eyes via little wedges that you create via the cuts. |
 |
| This is what your pineapple will look like when you're done cleaning it - looks kind of artsy doesn't it? |
 |
| Now cut your pineapple how you like. I make a ton of smoothies so I simply cut long wedges of pineapple and refrigerate them in a sealed container. Alternatively you can cut circles or wedges via strategic vertical and horizontal cuts. |


Sunday, March 3, 2013

Tuesday, February 26, 2013
HEALTH: Last Night a Neti Saved My Life

Why again? I tried it years ago, but could not for the life of me get it to work. For those of you who are not familiar with a neti pot, it is essentially a miniature porcelain (skip the BPA-laden plastic ones) watering pot. You fill this pot with warm saline water and use the spout to get water to flow from one nostril to the other via the nasal and sinus cavities. While it's not incredibly hard to do, it initially takes a few tries to get it just right; instructions are VERY helpful.
Long story short, I was able to breathe through my nose immediately after my first neti cleanse. Not only that, the pressure in my face miraculously went away. The results were nothing short of miraculous. If you're wondering, cleaning the sinuses using water is not a new practice. In fact, it has firm roots in Ayurvedic practices and is even part of the Muslim Wudu.
Follow the instructions below for a bearable Neti experience or read the Himalayan Institute's Guide - believe me, it's worth the results:
- Get your goods
- Porcelain neti pot - I personally like the Himalayan Institute Neti Pot, which is available at Whole Foods
- Pure Sea Salt - I skipped the tiny and pricey neti salt packages and just bought a large bottle of very high quality, unprocessed grey sea salt called Esprit du Sel, which is again available at Whole Foods
- DO NOT USE TABLE SALT - all of the added chemicals will burn the inside of your nose
- Prepare your saline mixture
- Boil approximately 10 ounces of water for at least 5 minutes
- THIS IS KEY - people have died as a result of infections caused by tap water mixtures. Forbes has a great article about how not to die while using a neti pot - read it.
- Add 1/4 teaspoon of sea salt to the boiling water
- Stir the salt in the boiling water until it dissolves entirely or near entirely
- Let the mixture cool for at least 10 minutes - pour it in the neti pot
- Work that Neti! Before you do - checkout the pic of Jessica Simpson rocking the Neti (trust me, this is better than a pix of yours truly)
- Setup your neti position - you may have to adjust this over time, but start here
- Look straight down into a sink
- Turn your head to the right such that
- One nostril is clearly higher than the other
- Your forehead is higher than your chin in terms of level
- Take the neti pot spout and stick it into the higher nostril
- Create a seal between the spout and your nostril
- Start raising the neti pot in order to pour the solution into your nostril
- After a few seconds, water will start to come out of your lower nostril
- DO NOT BREATHE THROUGH YOUR NOSE during this time
- Blow your nose when you're done
- I personally use half of the solution in each nostril - that is, I switch sides

NOTE: Nothing contained in the Site is intended to create a physician-patient relationship, to replace the services of a licensed, trained physician or health professional or to be a substitute for medical advice of a physician or trained health professional licensed in your state. You should not rely on anything contained in the Site, and you should consult a physician licensed in your state in all matters relating to your health. You hereby agree that you shall not make any health or medical related decision based in whole or in part on anything contained in the Site.
Monday, February 25, 2013
TECHNOLOGY: Instashare Makes Sharing...Fun (or Easy)
 How many times do you find yourself emailing yourself or Dropboxing items in order to have them on your phone, laptop, or tablet? Email no more with Instashare (@instashareapp). Transfer files between any of your favorite gadgets in seconds. I tried it out today with a photo on my iphone that I wanted on my laptop and it worked like a charm (actually, it's the photo below). Note: your gadgets have to either be connected by bluetooth or wi-fi for this to work - after all, there's no such thing as magic! Oh, and to prove that the best things in life are free...it is!
Wednesday, February 20, 2013
HEAL: Sugar Detox Failure Led to Lessons Learned

Onwards and upwards, a few good lessons were found in the ruins of my detox:
- Consuming sugar makes you want more
- What does this mean? Once I gave in to my first sweet treat, I immediately wanted more. There is a logical reason to all of this (a big thanks to Dr. Aaliya, @DrAaliya, for enlightening me on this process); as you consume sugar, your brain's pleasure center the nucleus accumbens receives a dopamine signal. You consume more sugar because it makes you happy, but with prolonged exposure, the signal weakens. You have to consume more sugar to get the same effect. Does this sound like the story of drug addiction or is it just me? Check The Atlantic for a deep dive on this topic.
- For serious addicts: minimize sugar consumption earlier in the day or delay it entirely until as late in the day as possible
- Based on the process above, it seems to me that addicts should try to delay their initial sugar consumption (outside of fruit) as much as possible (in terms of time of day) so as to prevent the urge to consume more sugar after a first "exposure"
- Following this strategy will also let you "save" your sugar intake for the goodies you absolutely must have
- Set a daily sugar limit for yourself and don't exceed it
- Sugar addict or not, it's almost impossible to avoid sugar entirely. Just like most of us set a general calorie intake level for ourselves, we should also figure out a limit per day of added sugars (refined sugar, high fructose corn syrup, agave, honey, etc). For women, the American Heart Association recommends capping daily intake of added sugars at 6 teaspoons or 24 grams of sugar. For men, the maximum recommended limit is 9 teaspoons or 36 grams of sugar per day. Some perspective: a can of coke contains 39 grams of sugar. Also, set a cap on calories that come from sugary treats.
- Get creative with your snacks
- Instead of reaching for honey to sweeten my afternoon yogurt, or adding a squirt of chocolate syrup to my morning yogurt-peanut butter smoothie, I came up with better snack alternatives to keep me full and sugar-free throughout the day
- Cottage cheese topped with topped persian cucumbers and half an avocado
- Spice with pepper, salt, and cayenne pepper
- Yogurt, peanut butter, and banana shake
- No sugar needed
- Raw almonds and walnuts
- That's it
- Tea or coffee with plain non-fat half-and-half or your favorite plain creamer
- You save yourself several grams of sugar from this small change alone
- Be sure to drink plenty of water to prevent hunger that really stems from thirst
- I have a BPA-free, clear bottle by Aladdin that I fill up at least twice a day - seeing my water consumption makes water more bearable to me than drinking it in a steel Sigg

Tuesday, February 19, 2013
HEAL: 7 Day Sugar Detox Plan

I've been trying to talk myself out of reaching for sweets due to the negative health impacts of sugar, but have had little to no success. Fortunately, my vanity forced me to admit my problem, and plan a swift plan of attack. After all, I work dang hard to fit into my size 2 jeans, and I don't plan on giving that up because I had one (or five too many) macarons. By the way, the picture featured here are the treats I had in the last 10 days...not good!
There's a great WebMD slideshow that talks about the body's relationship with sugar and resulting addictions - check it out to better understand the problem before diving unto my solution below:
- I am eliminating all added sugars for the next 7 days
- This includes honey, agave, stevia, etc, etc
- I am reducing my fruit intake...slightly
- I love, love, love fruit, but I plan on reducing my fruit to vegetable ratio I'm thinking 4-5 servings vegetables to 2-3 servings of fruit (I know this sounds like alot of fruits and vegetables per day, but some pretty authoritative sources are recommending between 5-13 servings per day vs the old 5) during this detox
- I am creating a "tolerance" plan for when my sugar cravings hit...and they will hit
- I plan to drink plain green tea, drink a glass of water, do a few jumping jacks, and maybe even take a walk
- I also plan to avoid situations that encourage social sweet consumption like frozen yogurt or cupcake outings with friends
- If the cravings continue at day 7, I'm extending my detox and repeating steps 1-3 for another 7 days
HOTSPOTS: Boba Guys Bubble Tea

Anyhoo, my love is back, and it's all due to the Boba Guys. They have created 100% natural bubble teas (Straus Family Creamery half and half, honey pearls, etc, etc) that are not only not bad for you, but actually taste amazing. I came across a Chow article this morning about them, and literally booked it to San Francisco from San Mateo to taste their creation. I highly recommend making a trip; my cousin (the cutie in my picture: @kmmunnssterr) and I tried their jasmine milk tea with almond jelly and tapioca pearls, and literally were so taken aback that we actually stopped talking...that never happens.
Monday, February 18, 2013
TRAVEL: Chasing Waterfalls at Golden Gate Park
I decided to actually use my bike this past weekend, and I'm glad I
did. My friend and I discovered an amazing waterfall at Golden Gate
Park.

 Here's my advice if you plan on visiting the park: rent a
bike at this little bike store on Fulsom/6th, bike into the park, tour
around, and end your ride at the de Young Museum cafe.
Here's my advice if you plan on visiting the park: rent a
bike at this little bike store on Fulsom/6th, bike into the park, tour
around, and end your ride at the de Young Museum cafe.


Thursday, February 7, 2013
SPECIAL OCCASIONS: T-7 Until Valentine's Day
 Whether it's shopping, speaking, or decorating - I pride myself in my pragmatic nature. Why make things complicated right? Well, all bets are off when it comes to Valentine's Day. Though the holiday originally celebrated the martyred Catholic St Valentine; I prefer to follow the Middle Age interpretation first popularized by Chaucer.
Valentine's Day reminds me of my childhood; cutting red paper doilies in the shape of hearts, wearing red or pink on the 14th of February, eating red or pink foil covered chocolates, and bestowing your besties with pre-fab cards featuring the Smurfs or some other 80's cartoon character. What could be better than sharing love for all?
To this day, I still enjoy sharing love for all rather than just for one on this holiday. I figure that I have anniversaries and birthdays to tell my husband that I love him; why not use this day to let your friends know that you love them? Whether you share Valentine's Day with one or all; here are some unique ways to make this holiday a fun, and relatively guilt-free blast:
- Drinks
- Presentation Note: present the following fun drinks in Mason Jars or tall glasses; be sure to add a cute paper straw
- Pomegranate and Sparkling Water Spritzers
- Pour a splash of pomegranate juice into sparkling water
- Do not mix until ready to serve
- Strawberry Milk
- Blend strawberries with milk and a touch of vanilla yogurt for a fun drink
- Chill until ready to serve
- Berry Herbal Tea
- Brew berry herbal tea
- Let cool to room temperature or slightly warmer
- Serve warm in clear mugs

- Sweet Treats
- Strawberry Vanilla Mousse
- Blend 3 cups of frozen strawberries in a food processor, add in prepared vanilla pudding (use an instant mix - I like the Trader Joe's one), blend, and refrigerate for at least 2 hours.
- Serve in individual cups or glasses and garnish with a light whipped cream and a sprig of mint
- Molten Chocolate Cake
- If you're gonna have a molten chocolate cake on Valentine's Day - take the plunge! Although, do workout or balance your calories elsewhere - staying fit is a zero sum game my friends! Williams Sonoma has provided a beautiful picture of one that makes my mouth water - click on the picture for a recipe to this must-have dessert.

**This post is a collaboration with Williams-Sonoma, but all words and opinions are my own
Wednesday, February 6, 2013
PHOTOGRAPHY: Taking Pictures of Food...at Night...on Your iPhone
Why do we take pictures of food? We love the food itself; we want to make our dieting Instagram/Facebook friends cry a little; we like taking pictures, etc. The list goes on. In any case, we want these pictures to look ahhmazing. How do you do that when you're in a dark, dimly lit restaurant, with a dark chocolate cake? Simple. Here are the rules:
- Never, ever use flash. Amateur flash (the kind that most of us have on our cameras or phones) does very little to enhance the beauty of a picture. It really just does a good job exposing the subject. Very Zero Thirty like - this is no bueno for your food shots.
- Use props: use the candles, silverware, and drinks on your table to your advantage. Setup props several dimensional layers deep.
- It takes two: you're likely out and eating with someone else, have them help you.
- Download a flashlight app: not only does this app (I have the generic "Flashlight" on my iPhone) help you locate your keys in a ginormous bag, it also provides the right lighting for a dark situation. Have your dining buddy hold the flashlight high above the subject, and snap your picture!

Tuesday, February 5, 2013
BREAKFAST: Chapati/Whole Wheat Flour Waffles with an Apple Compote
 Homemade waffles (hello waffle maker) and apple compote with no sugar added.
Subscribe to:
Posts (Atom)